Today's project uses no stamping or inks...GAH...can you believe it?!? Instead, I made good use of beautiful papers, a pair of tiny scissors, some gorgeous glitter and foam squares in 3 sizes to accomplish a Paper Tole of sorts. Have a look...
Using 2 identical sheets of the same patterned paper from this Happy Birthday paper pack is what makes this design work. I started with a 6" x 6" white card base from the Value Pack and layered it first with the tan striped pattern. I then traced that directly onto the floral pattern exactly where I wanted it, so that the parts I wanted to include would show front and center.
The next step was to cut out the parts of the pattern design that I wanted to highlight with elevation...1 large rose, 1 small rose and the bird.
Using small detail scissors makes it easy to cut in close and capture all the details! The leaf embellishments are left over from the Poppy Paper Crafting Medley set that I also used in my first Itsy Bitsy post.
I used generous amounts of foam squares in all 3 sizes to layer everything up! And on the leaf diecut pieces I used mini glue dots.
Before adhering the smaller flower to the card front, I added Pale Copper Fairy Dust glitter to the center of it. Here you can see the spout top that I was bragging about the last time...still loving it, lol!
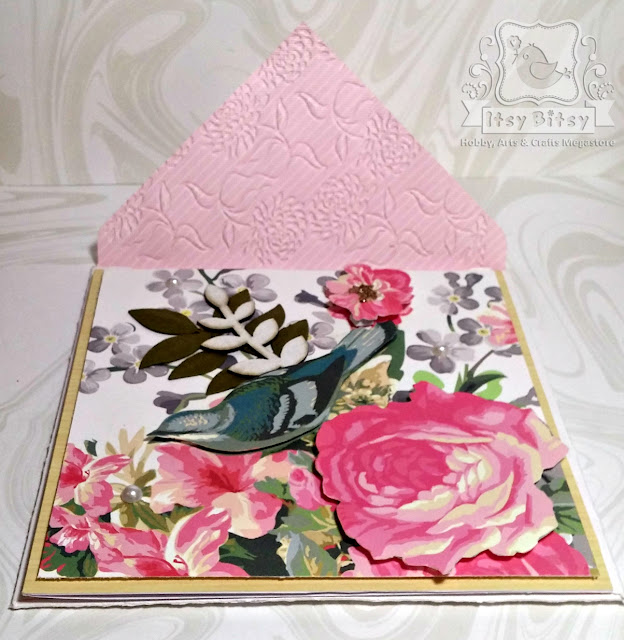
I wanted to make my own envelope for this card, so I used another pattern from the same paper stack and turned the pink strip to the inside. I then ran just the top flap through my embossing machine with the Blossom-Mums embossing folder to impress the floral design on it...it offers a very classy look, as you can see in the pictures further down below.
The final touch after assembling all the layers was to add 3 of the 6mm adhesive backed half pearls scattered across the card front as you can see here in the detailed pics near the left side.
I love the way this card turned out and it was alot of fun to stretch my supplies and create something without any rubber stamps and ink!
The inside I left blank with plenty of room for a handwritten message -just using a few scraps of the patterned paper left over from the card front.
And here's what the envelope flap looks like from the inside...
and from the outside, once the card is tucked safely inside! So pretty, right?
Thanks for having a look ~ Until next time ~ Happy Crafting!


No comments:
Post a Comment